Topics
- Urgent Help
- Sales Module
- Discuss
- Calendar
- Live Chat
- Website Manager
- Property Management System
- Room Servicing
- Extras
- Emails
- Creating Email Templates
- Selling Groups
- Customer & Companies
- Agents & Sales Channels
-
Rates
- Dynamic Rates
- Back End Setup Dynamic Rates
- Room Rate Selling Group Mapping
- Rate Calculation
- Back End Bookings
- Front Booking Screen Dynamic Rates
- Rates & Min Stays calendar screen
- What your Customers See
- Changing Rates - Guide
- Price Change Long Term
- Change Min Stay ( long term)
- Multiple Min Stay Prices
- Day of Week Price Variation
- Create New Rate
- Promo Codes
- Bookings
- Acquire Credit Card Details
- Make A Booking
- Full New Booking
- Cancel a Booking
-
Payments & Invoicing
- Invoice & Debtors
- Invoice Due Date
- Create Invoice
- Invoice Payments
- Reasign Invoice Payment
- Cancel / Amend Invoice
- Invoice Agents Comissions
- Invoice Journaling
- Reset Audit Errors
- Debtors
- Adding A Booking Payment
- Refund A Booking
- Charge Cancellation Fee
- Split Payments
- Customer & Company Account Trans
- Amend / Delete Booking Payment
- Reports
- Marketing Module
- Settings
Owners Image Gallery
Steps to create Owner’s Gallery
Click on the WEBSITE MANAGER menu and select the OWNER GALLERY menu from the list of sub-menus under PROPERTIES.
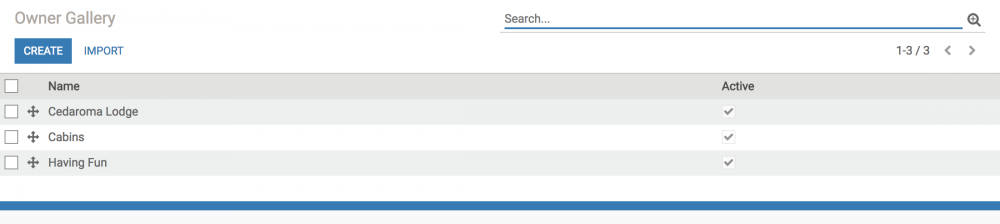
Click on CREATE to add a new ALBUM
On the page that opens, you will notice that the sequence is automatically picked. You can provide a name to the ALBUM in the name field and click on SAVE.
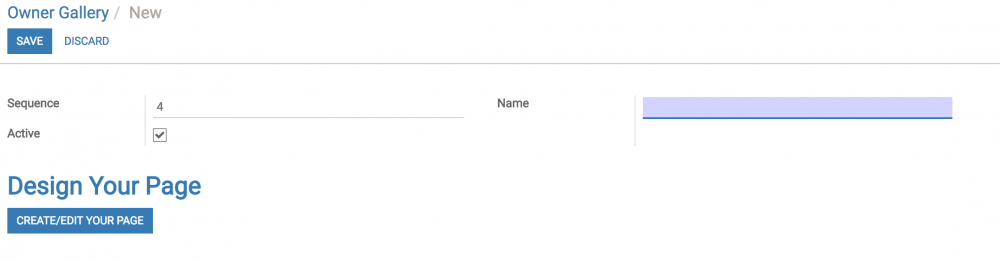
Now, click on the CREATE/EDIT YOUR PAGE button to add content to the album.
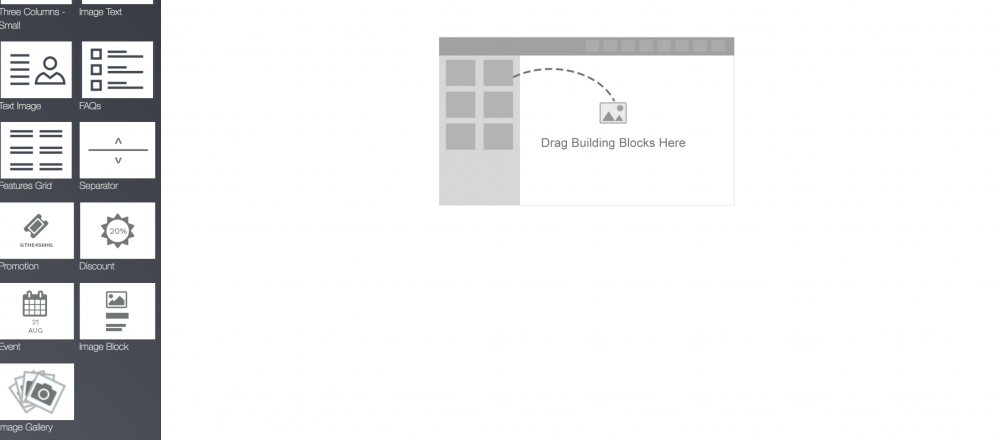
Drag the IMAGE GALLERY widget (the last one in the list of widgets) to the page this icon here

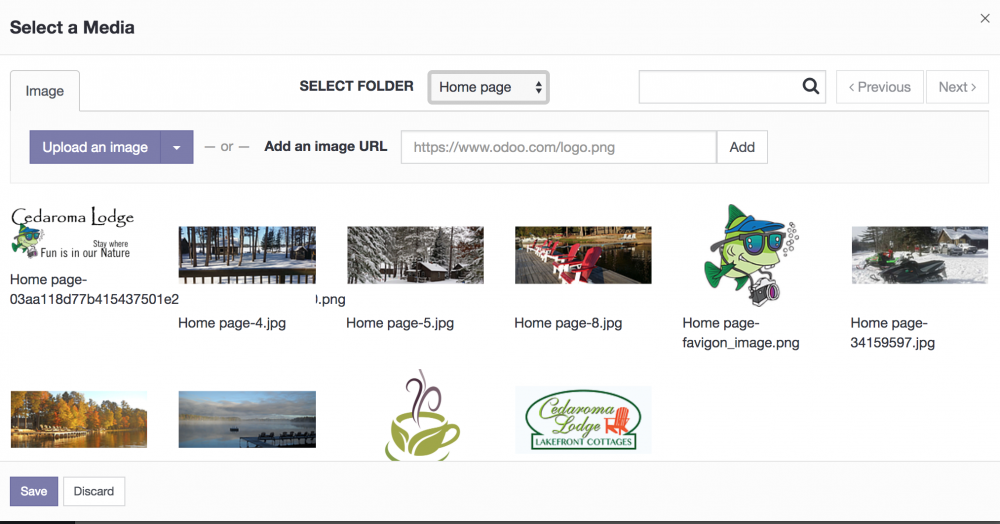
Click on the ADD IMAGES button. This will open the IMAGE BANK and you can add multiple images in one go by keeping the SHIFT button pressed while selecting images. Once you have selected images, click on SAVE.
Use the CUSTOMIZE option to modify the gallery.
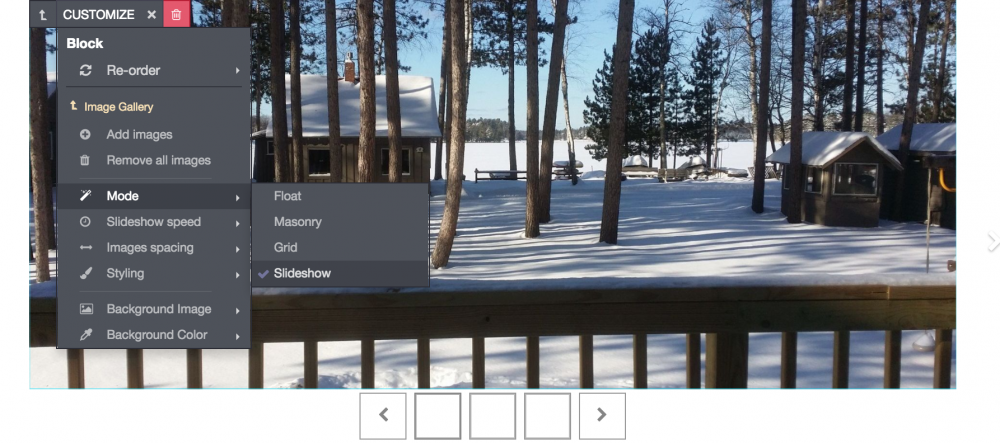
You could choose from the MASONRY, SLIDESHOW and other modes to change the way the images are displayed.
There are also other options such as number of columns to be used, spacing between images and their styling.
Once you have completed making the changes, click SAVE and BACK to return to the album page.
Repeat the above steps to create more albums.
The albums thus created will be displayed on the GALLERY page of your website along with the album from Facebook.