Topics
- Urgent Help
- Sales Module
- Discuss
- Calendar
- Live Chat
- Website Manager
- Property Management System
- Room Servicing
- Extras
- Emails
- Creating Email Templates
- Selling Groups
- Customer & Companies
- Agents & Sales Channels
-
Rates
- Dynamic Rates
- Back End Setup Dynamic Rates
- Room Rate Selling Group Mapping
- Rate Calculation
- Back End Bookings
- Front Booking Screen Dynamic Rates
- Rates & Min Stays calendar screen
- What your Customers See
- Changing Rates - Guide
- Price Change Long Term
- Change Min Stay ( long term)
- Multiple Min Stay Prices
- Day of Week Price Variation
- Create New Rate
- Promo Codes
- Bookings
- Acquire Credit Card Details
- Make A Booking
- Full New Booking
- Cancel a Booking
-
Payments & Invoicing
- Invoice & Debtors
- Invoice Due Date
- Create Invoice
- Invoice Payments
- Reasign Invoice Payment
- Cancel / Amend Invoice
- Invoice Agents Comissions
- Invoice Journaling
- Reset Audit Errors
- Debtors
- Adding A Booking Payment
- Refund A Booking
- Charge Cancellation Fee
- Split Payments
- Customer & Company Account Trans
- Amend / Delete Booking Payment
- Reports
- Marketing Module
- Settings
Express Check In Setup Screen
Under Settings > Email you will now see Express Check In Configuration as a menu option.
This will take you to the Express Check In Configuration overview and setup screen.
Select the “New Config” button j to start setting up your pre-arrival form:
Pre Arrival
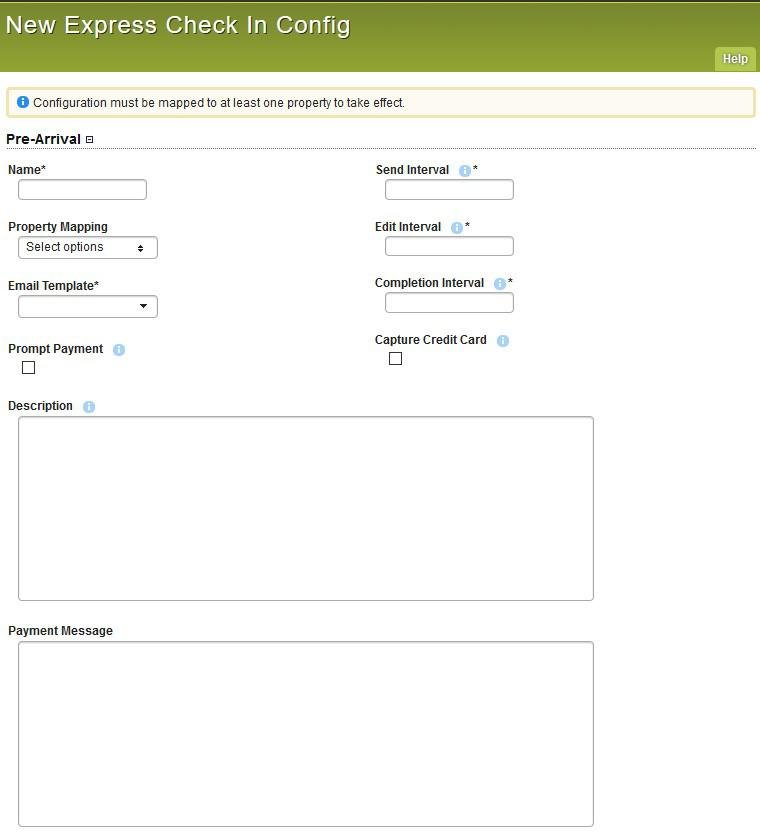
- Name: The name of the pre-arrival form, customers will not see this name
- Property Mapping: Select which properties the form will be available on
- Email Template: Select which email you want this form to be sent out with
- Send Interval: Enter in how many days prior to arrival you want the pre-arrival email sent out to the customer
- Edit Interval: Enter in how many days prior to arrival the customer can fill out the pre-arrival page
- Completion Interval: Enter in how many days prior to arrival the pre-arrival form can be completed before it becomes uneditable
- Prompt Payment: Select if you want the customer to be prompted for final payment (if booking is unpaid)
- Capture Credit Card: Select if you wish to capture the customers credit cards
- Description: The description will appear on both the pre-arrival form and also the post arrival screen
- Payment Message: The payment message will appear on both the pre-arrival form and also the post arrival screen
Guest Fields
Select which radio button is required for each field This is an easy way to gather details and more accurate information which may of been missed at the time of booking eg vehicle registration if a hired vehicle or a more realistic ETA
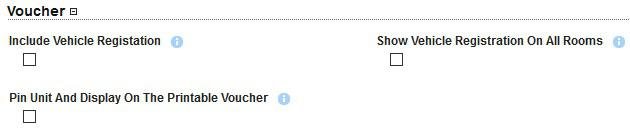
On the pre-arrival form the customer is able to print their booking voucher. Here you have the option on whether or not to display the vehicle registration and unit number with the voucher.
Tick to include on voucher, leaving unticked will mean they are not displayed.
Note: Displaying the unit name on the voucher will also ‘pin’ the unit
Post Arrival
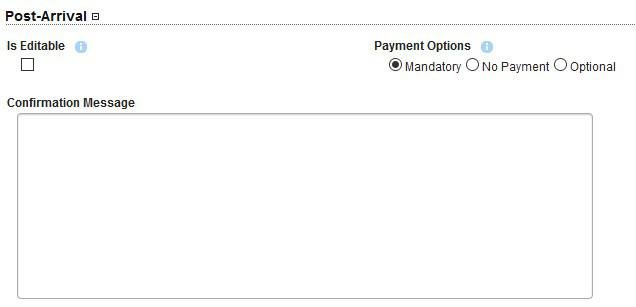
Is Editable:
If you had previously selected a ‘completion interval’ in the pre-arrival section, ticking this option will override those restrictions
Payment Options:
Mandatory - Customer is required to have fully paid/entered credit card details before they are allowed to check in No Payment - Customer is able to bypass the payment section and check in Optional - Customer has the option to either pay with credit card on the tablet/phone, or pay at a later time with another method (eg eftpos/cash)
Confirmation Message:
Will appear on the post arrival screen after a guest has checked in.
Once you have filled out all the required fields and saved you have the ability to upload a banner/logo (like the front booking screen).
An example of a completed express check in configuartion screen can be seen here :
"Link text":{DOCUMENT-LINK+express-checkin-configuration-example}